INSTALLING RAIL PANELS IS EASY!
Installation of Lines panels by ScandiWall is a simple task even with minimal construction skills.
Our slatted panels can be fixed with both liquid nails and self-tapping screws.
The LINES panel is completely ready for installation: the slats are assembled on an acoustic felt base, which reduces installation time several times compared to individual slats.
Slatted panels are easy to install not only at the stage of major repairs, but also to decorate an existing interior.
DO I NEED TO PREPARE THE WALL?
Usually, no. Since the panels have a base, there is no need to prepare and paint the walls. The only thing is that the wall should be flat and strong. The weight of the panels is minimal, so they can be mounted on absolutely any surface. Including the ceiling.
WHAT TOOLS YOU WILL NEED
- Level
- Pencil
- Liquid nail glue (with the gluing method)
- Drill, screwdriver (with the method - fastening with self-tapping screws)
- Self-tapping screws (we recommend black ones with a cap).
- Stationery knife
- Jigsaw
PREPARATION AND STAGES OF WORK
1. Measure the width and height of the area to be installed and check the levels. Remove the skirting board if necessary.
2. Trim the panels based on the measurements. For more information on trimming, see below.
3. Mount the panels using one of the methods described below.
METHOD 1. Gluing the panels to the wall.
We recommend using high-quality liquid nail adhesives, which are available with a quick fixation, to simplify installation.
📦 Approximate consumption:
1 tube (300-400 ml) ≈ 2-2.5 m² of panels
INSTALLATION PROCEDURE:
- After trimming, apply the panel without glue to check the dimensions.
- Apply the glue in strips: around the perimeter and several strips in the middle
- Place the panel against the wall and press firmly over the entire planeespecially at the edges.
- If necessary, hold for 1-2 minutes (depending on the adhesive).
Follow the instructions for the mounting adhesive you are using.
The advantage of this method is its simplicity. Measure and stick the panels on the wall with liquid nails - that's it! Disadvantage: it will be difficult to dismantle the panels from the wall if necessary. Also, the ceiling must be fixed with additional screws (!).
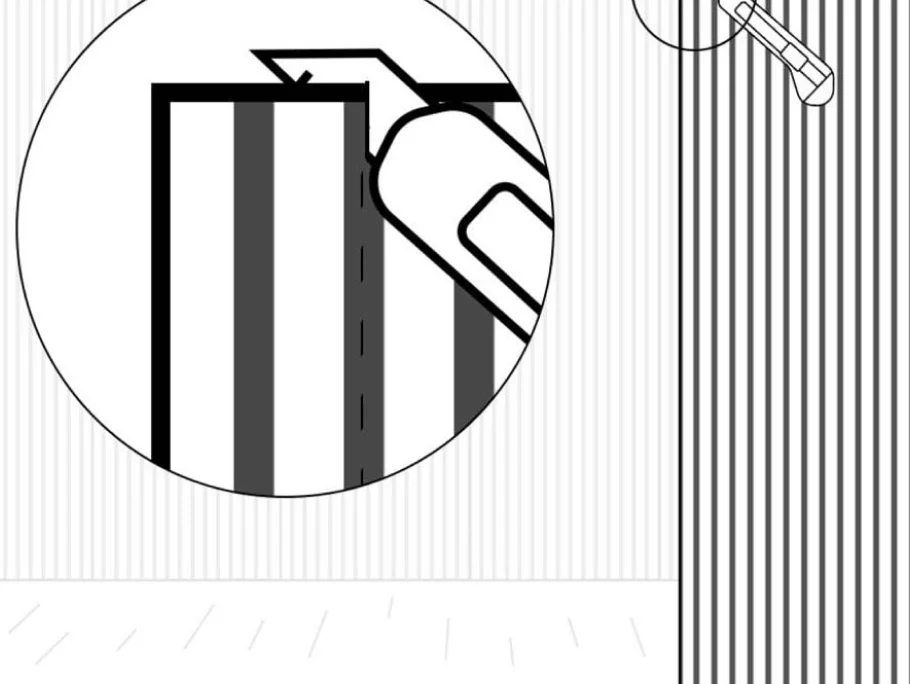
METHOD 2. Screwing to the wall or mounting rail with screws

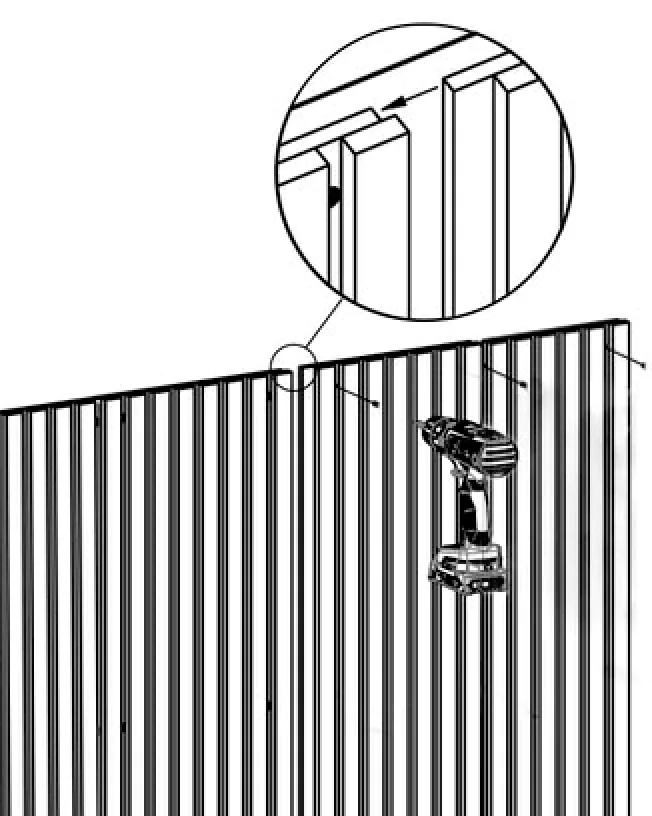
The screws are screwed into the felt between the slats.
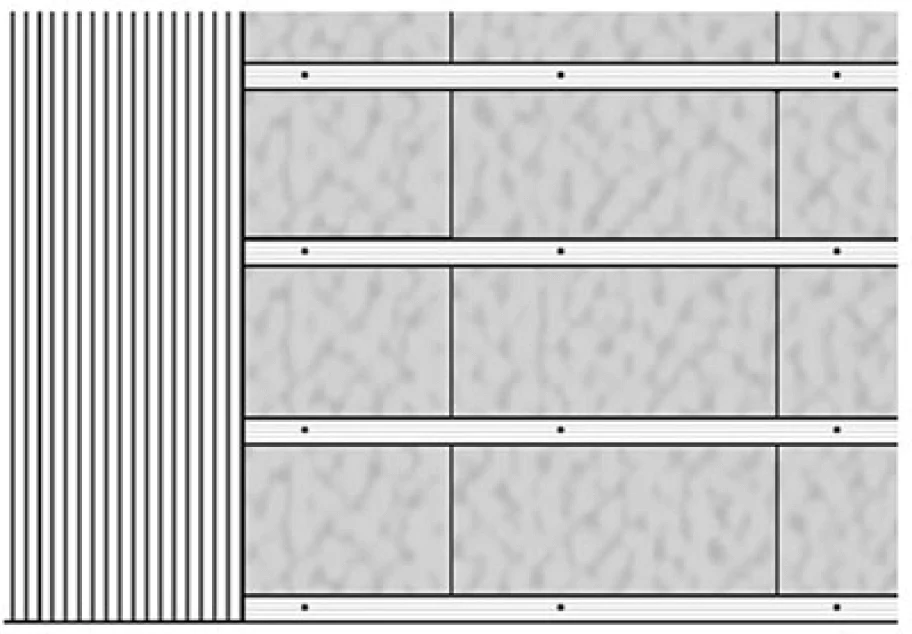
Fastening of Lines. It is enough to screw in 3 screws along the width of the panel (this will be a row), with a step of 50-60 cm between the rows vertically. There will be 5 such rows in height. Thus, 15 screws are required for one Lines acoustic panel (for 5 rows).
For mounting the Lines Mini panel 6 screws will be enough.
It can be screwed to mounting slats/bars or directly to the wall. This method of fastening allows the panel to be removed at any time, unlike liquid nails.
Advantages: the panels can be easily dismantled. If you screw them onto a bar or rail, it provides additional sound insulation. Disadvantage: more labor intensity, more space is taken away from the room.
SOUNDPROOFING - HOW TO ACHIEVE A NOTICEABLE EFFECT?
It should be noted right away: acoustic panels improve exactly acoustic comfort in the room, reducing echoes, but is not a material for professional soundproofing by itself. The panel has some soundproofing properties, as the slats are mounted on a 7 mm thick acoustic felt base, and the slats create a diffusion of sound waves. It should be noted that after installing the panels directly on the wall, a slight sound absorption is achieved, which corresponds to approximately Class D. Of course, the effect also directly depends on the area of the panel cladding.
To achieve Class A/B sound insulation, additional measures must be taken. It must be mounted on a 45 mm thick beam. Mineral wool or acoustic mats 45 mm thick are placed between the bars. Then screw the panels as in method #2.
This method of installation will provide you with a fundamentally better level of acoustic comfort, if that is your goal.
Cutting panels to size
The width of the panel is easy to cut along the seams - since you only need to cut the soft felt backing. A sharp knife, such as a utility knife, is suitable for this purpose.
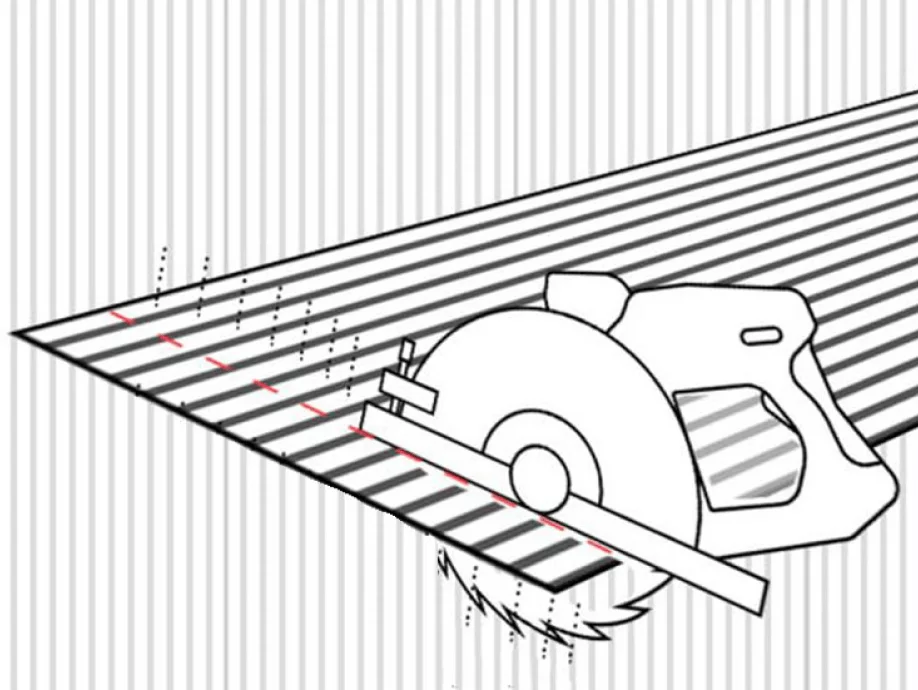
The panel is cut to length using a jigsaw with a clean-cutting saw or a circular saw.
If you have any questions, don't hesitate to call us and we will be happy to advise you.
And share with us photos of your beautiful interiors with slats 🙂.